4.1 Traceability: An Unbroken Chain of Transfer Comparisons
Calibration is the most important prerequisite for accuracy in measurement instrumentation. It is the foundation upon which subsequent measurements are based upon. Optical radiation calibration is typically done by the transfer method where the relationship between the value indicated by a measuring instrument and the value represented by a calibration standard is compared with the former reading, adjusted as needed, recorded and certified. Since the reading of a meter-under-test is directly compared with that of the transfer standard, the qualification of this standard is of the highest importance.
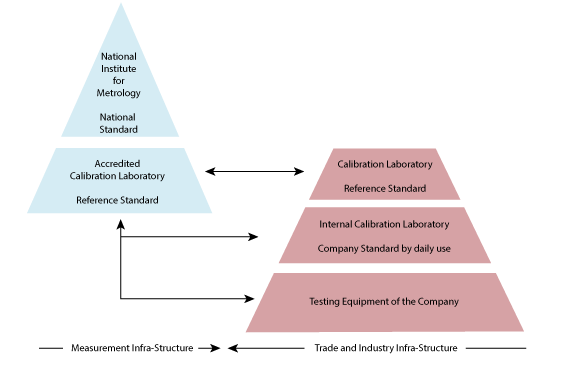
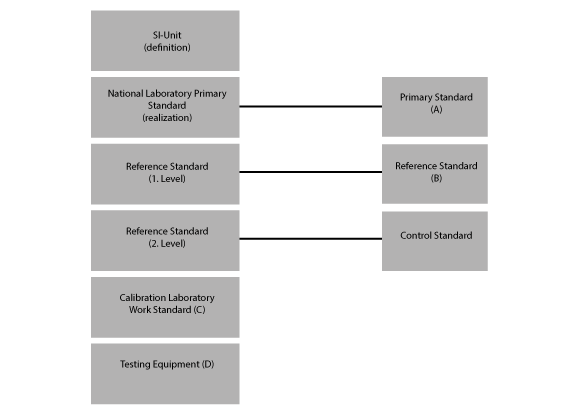
A qualified standard should display an unbroken chain of transfer comparisons originating at a national standards laboratory. For example, the transfer standard of the national laboratory, primary standard (A) is used to calibrate the reference standard (B) at an accredited calibration laboratory. This reference standard is used to calibrate the laboratory work standard (C) to be used daily by the calibration lab. This work standard is then used to calibrate the final product (D) or device under test. The calibration path is thus described as A–B–C–D. This path is called the chain of traceability. Each transfer device in the chain should be subjected to periodic examination to ensure its long-term stability. The lab performing the calibration typically sets the time span between examinations and is self-audited.
Accredited calibration laboratories guarantee recalibration cycle times for their standards plus a review of their calibration procedures since they are subject to review by an official accreditation authority.

Fig. 1: Calibration hierarchy from primary standard to test equipment

Fig. 2: Hierarchy of standards
See all our certifications and activities in scientific bodies and technological communities. Furthermore we are active member in several DIN working groups.